In part 1, we saw how to build the hardware and connect all the wires to the Raspberry Pi for our Ambilight kit.
In this article, we will proceed to install and configure the software to make the magic happens.
Choose the software
To control the LEDs, the two most famous software (at least that I am aware of) are Boblight and Hyperion. Boblight is now an official plugin of XBMC and so very easy to install, while Hyperion is more lightweight and efficient. Hyperion is developed with the Raspberry in mind. Here is an extract from the wiki page of the author:
Why choose Hyperion? Hyperion is built with the Raspberry Pi’s limited amount of processing power in mind resulting in an implementation that is about 15x faster. Where Boblight is setup as a client-server, Hyperion is built in a single app. This drops the need to serialize and deserialize all data sent between the video grabber and the led controller
For this reason I chose Hyperion over Boblight and I can confirm that I do not feel any delay in the use of OpenElec after installing it.
Install Hyperion on OpenElec
The first step is to connect to our Raspberry with SSH protocol. If you have a Windows operating system I suggest you to use PUTTY, if, instead, you are on OSX, the Terminal app will do just fine.
Connect from Windows
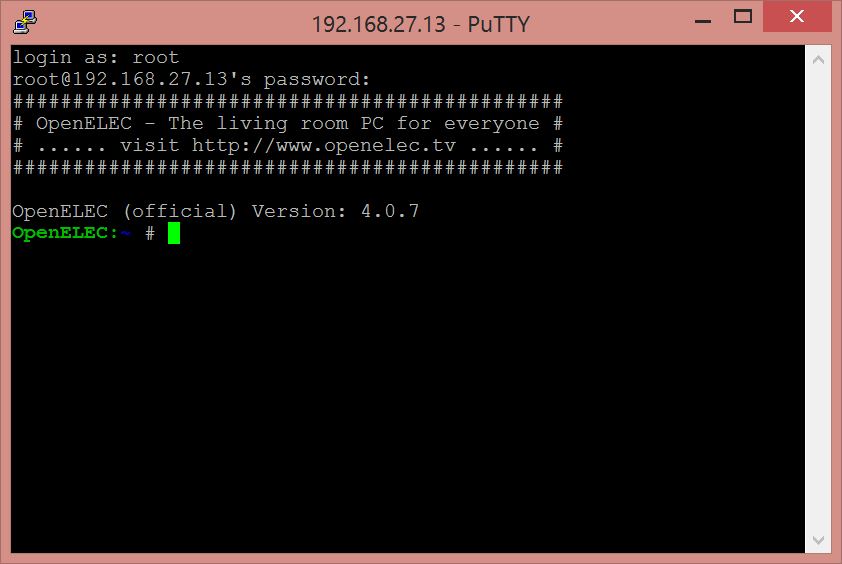
To connect with windows download PUTTY and launch it, no install needed. Fill in with your OpenELEC IP, select SSH connection and then press the “Open” button.
You should have something like the picture below (as you can see, the IP of my OpenElec is 192.168.27.13):

Connect from OSX
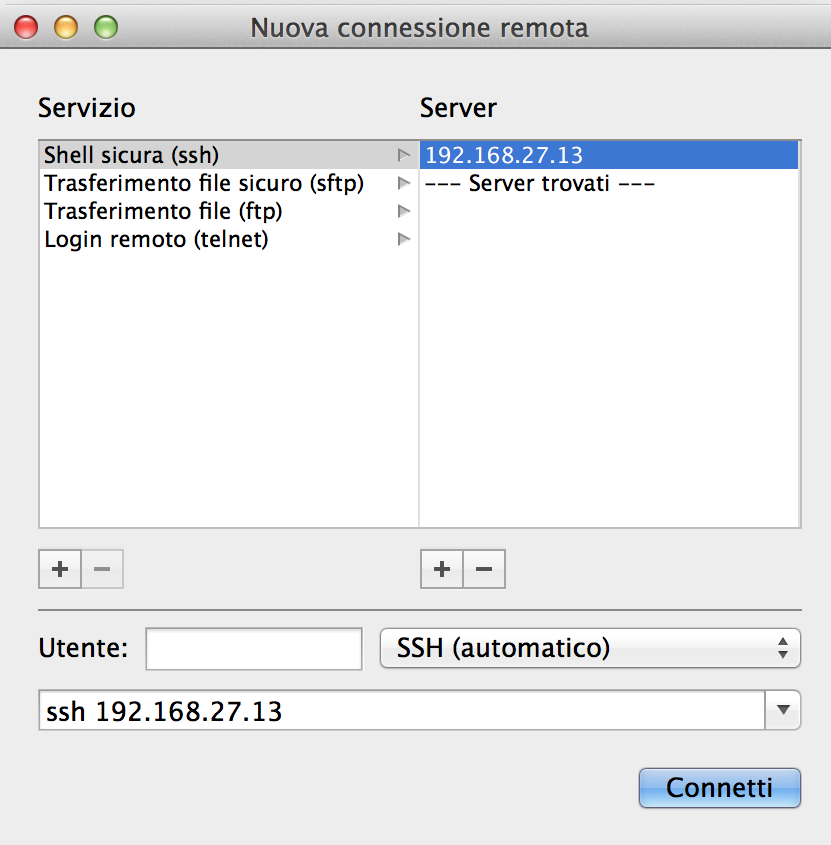
To connect to your OpenElec from OSX just open a Terminal and then, from the main menu, select Shell –> Open Remote connection. A new window will open asking to select the connection type and server IP.
Select SSH on the left panel and, in the right one, press the + button on the bottom and insert the IP address. Leave the user name empty for now and press Connect.
You should end up with something like this:
Install
From this step onwards, the procedure and what you will see in the terminal window, will be the same for both Windows and OSX.
If you did everything correctly, you should see the terminal asking for username and password. Insert root for the username and openelec for the password.
These are the default values after a clean install of OpenELEC. So, if you changed it, login with the correct password for the user root.
You should see a screen like this:
What we will do now, is download the script for the first installation of Hyperion.
In the console, write or paste this command:
curl -L --output install_hyperion.sh --get https://raw.githubusercontent.com/tvdzwan/hyperion/master/bin/install_hyperion.sh
When the download completes without errors, execute this command:
sh ./install_hyperion.sh
If everything went as it should, you know have installed Hyperion successfully.
We have already done half of the job. Here is what you should have on your terminal:

Configure
Before proceeding, from this link, download the program HyperCon. Be sure to have java installed on your machine and then execute it.
Here is a screenshot of the program with my configuration loaded:
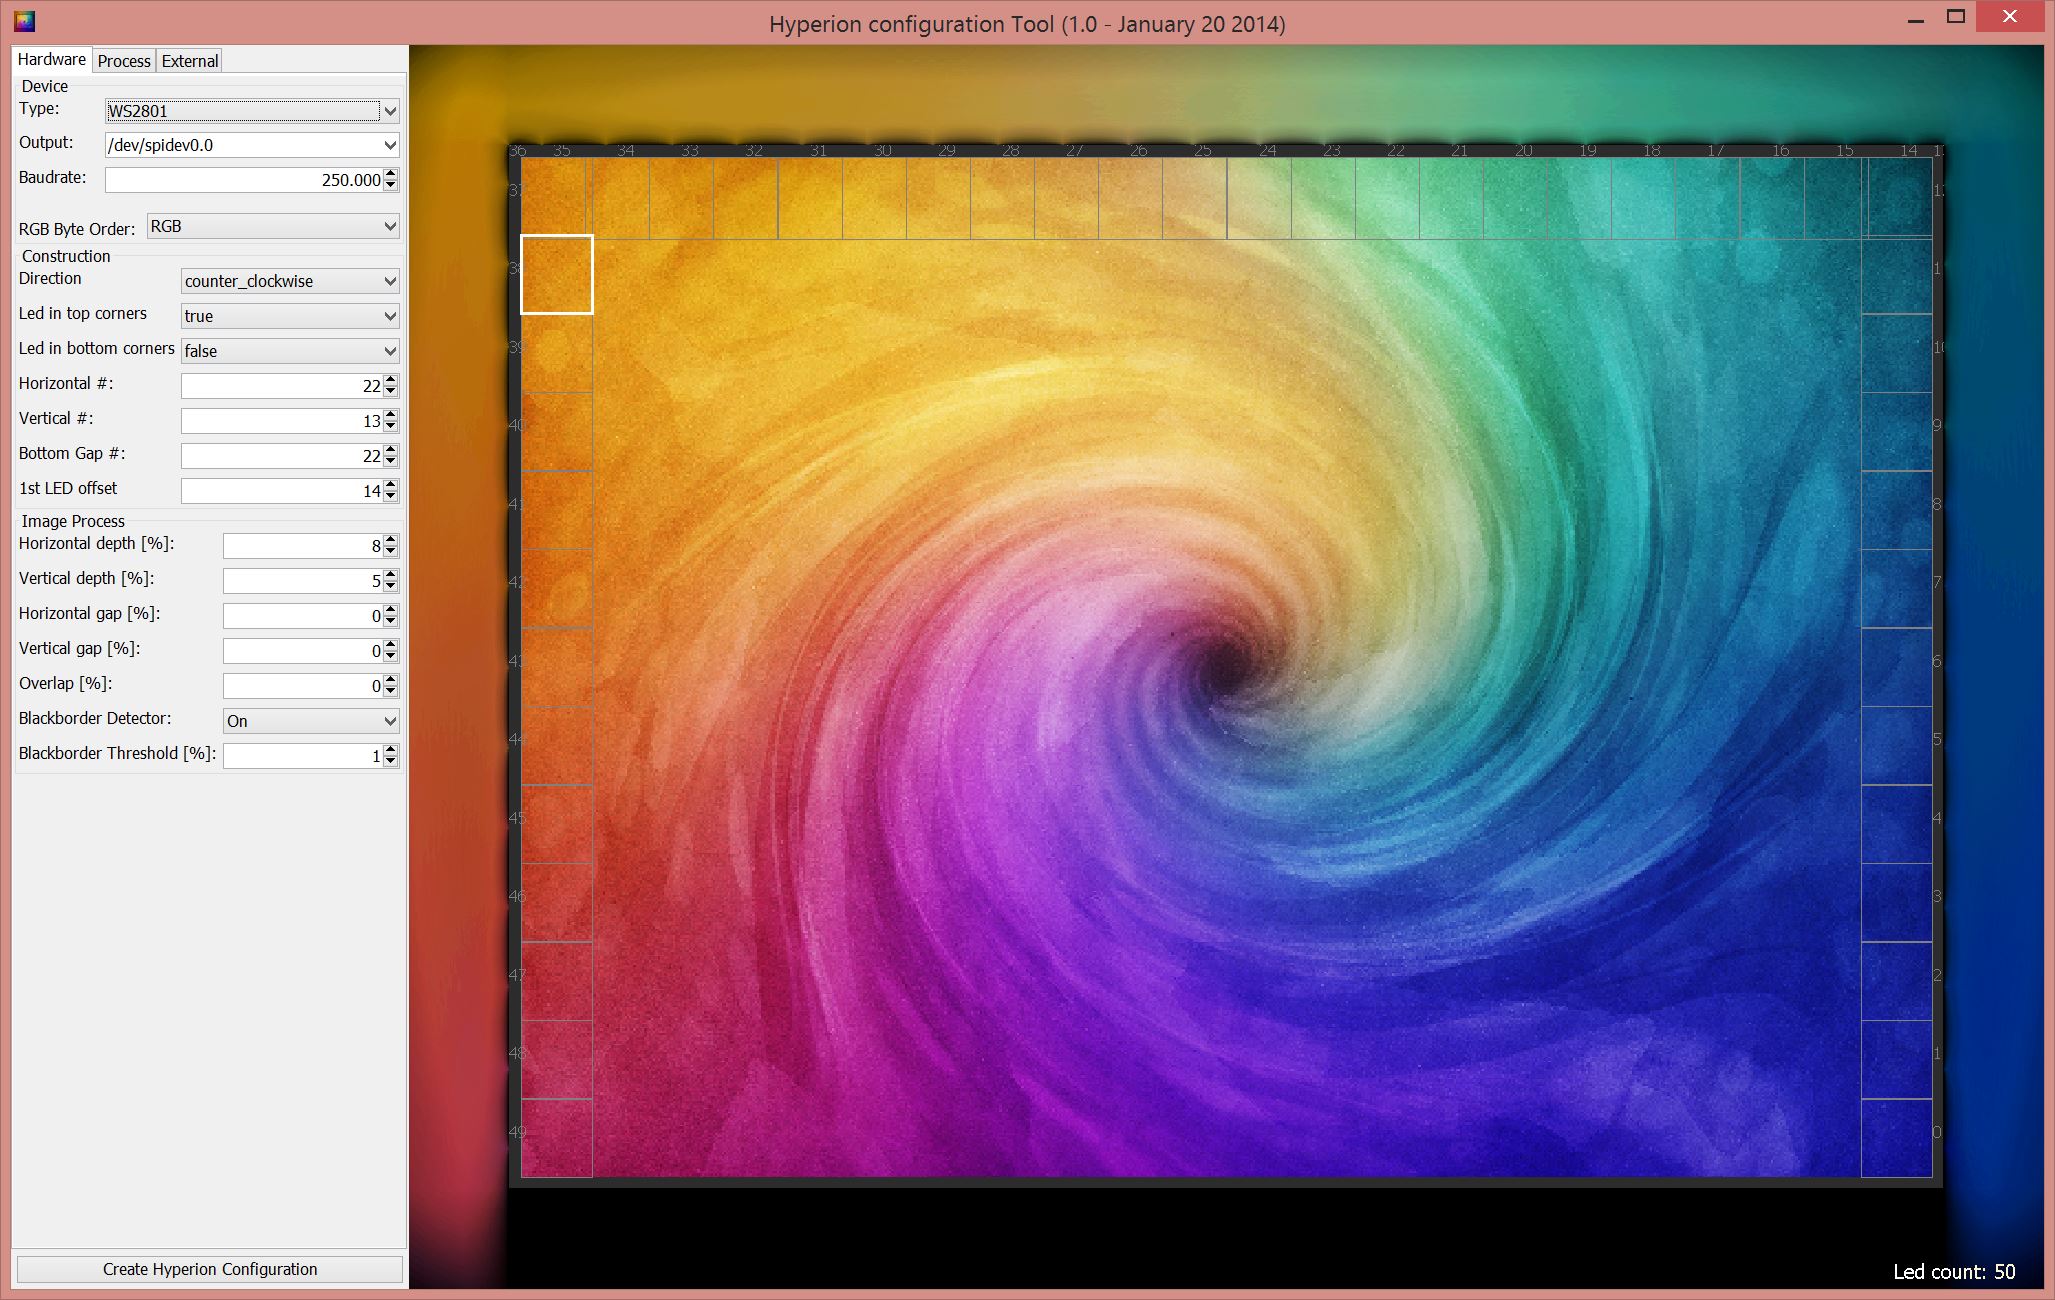
As you can see, the configuration is straightforward. Just specify the chip type and the number of leds that you have on the sides of your television.
For our specific setup (see my previous post here), we need to make some adjustments in the Construction section. More precisely:
- Direction: counter_clockwise;
- Led in top corners: true;
- Led in bottom corners: false;
- Horizontal #: 22;
- Vertical #: 13;
- Bottom Gap #: 22;
- 1st LED offset: 14;
While you change these settings, the main picture on the right should adapt. You should see “led count 50” in the bottom right corner of the window, the first led (with index 0) in the bottom right corner and the last one (with index 49) in the bottom left corner of the black frame.
Vertical # and horizontal # indicate the number of leds on the sides. In my case 13 leds on left and right borders and 22 on the top one. The bottom gap # is the same as the top one, because I do not have leds on it.
Now we just need to create and save the configuration file by pressing Create Hyperion Configuration. When you do that, the program will ask you where to save the file.
Do not change the name and save it where you prefer on your computer. Remember where you saved it, because we will need it in the next step.
Important change to the config file
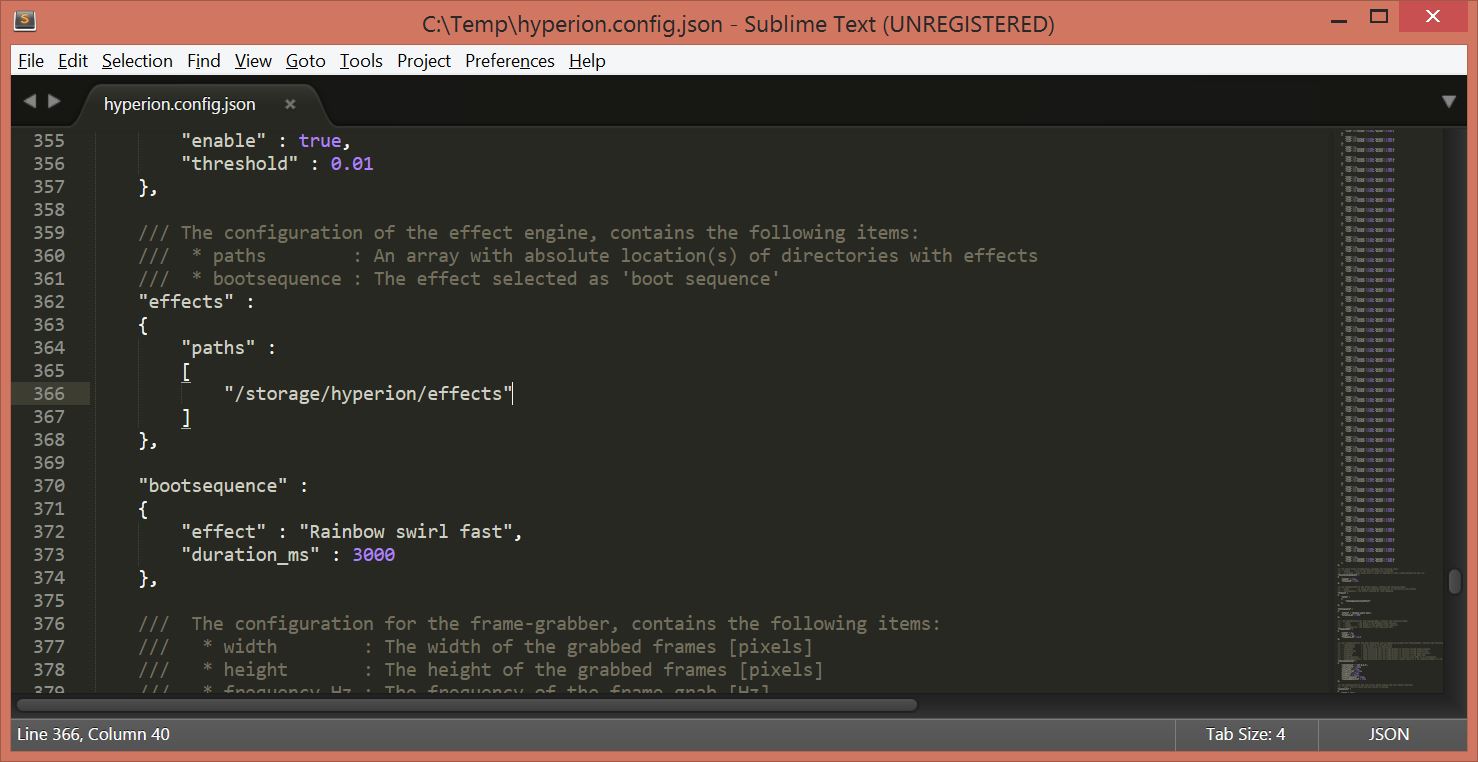
Before copying our file to OpenELEC, we must make a change to the path of the Effects folder in our configuration. It should be /storage/hyperion/effects instead of /opt/hyperion/effects. Hyperion folders on OpenElec are in different paths than the standard ones.
Open your configuration file (hyperion.config.json) with your preferred editor, go to line 366 and do the change.
From this:

to this:
Copy the configuration to OpenElec
We are almost done, we just need to send our configuration file to OpenElec and then test if everything works as it should.
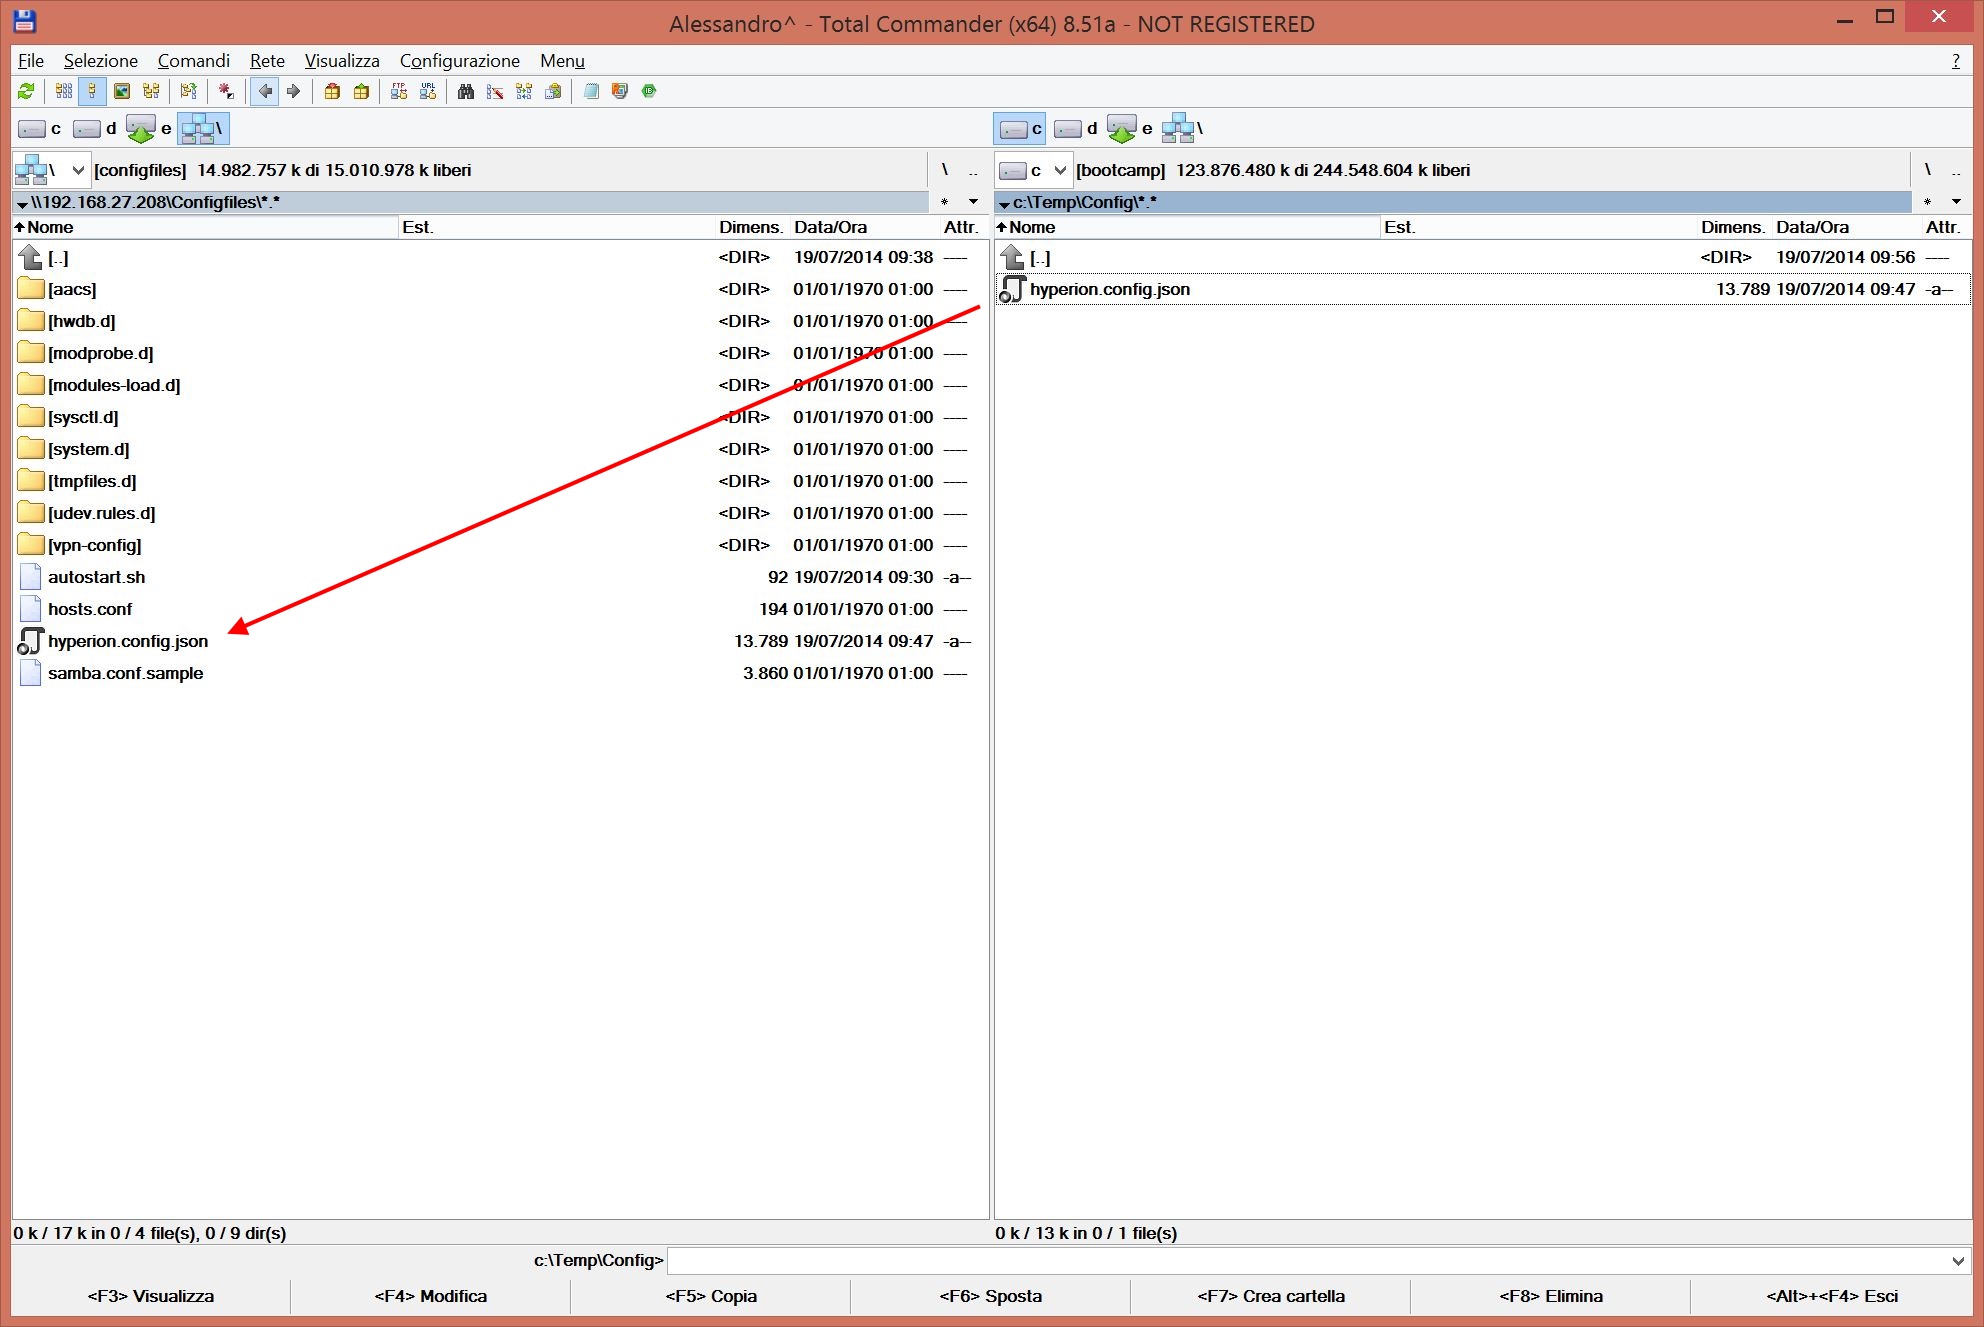
To copy the file, use your preferred file manager and copy the hyperion.config.json to the Configfiles folder. In this folder, should be already present a file with the same name. In case, just overwrite it.
In the below picture I used Total Commander, but I think you will understand what you need to do with your file manager:
Restart your Raspberry Pi and Hyperion will be ready.
If everything went right, while OpenElec load the XBMC, you should see the Hyperion’s rainbow effect executing.
Test our setup
To be sure that Hyperion is configured correctly, you can use this YouTube video. To do that, you can download the video and copy it to a USB pen, or install the YouTube add-on of XBMC. The result should be like my video here:
If you want to do more testing, connect to OpenELEC and launch one of these commands:
/storage/hyperion/bin/hyperion-remote.sh --priority 50 --color red --duration 5000
/storage/hyperion/bin/hyperion-remote.sh --effect "Rainbow swirl fast" --duration 5000
The first command will light the leds with color red for 5 second, while the second will execute the rainbow effect for 5 seconds.
Final notes
If you need it, here you can download the config file generated by HyperCon and used in this post.
That is it, now you have a cool ambient lighting for your Raspberry Pi.
Update
For a solution that accepts any video source, look at part three